What cases are, how they move through their lifecycle, and how to review them
Cases
A case is the unit of work in 9thSense. Each case represents one verification run for one subject — a loan applicant, an onboarding customer, an insurance claimant. Every document upload, tool execution, and reviewer decision is attached to a case and permanently logged.
Lifecycle
Cases move through four states:
collecting → processing → review → completed
| State | What it means |
|---|---|
| collecting | Waiting for required documents. The agent's goal_rules define which documents are needed. |
| processing | Documents received; the agent pipeline is running (classify → extract → validate → score). |
| review | Processing done; a human reviewer must approve or reject before the case closes. |
| completed | Final verdict recorded. The case is immutable and available for audit. |
Not all agents require a review step. An extraction-only agent (Level 1) can move directly from processing to completed if all validations pass and the risk score is below your threshold.
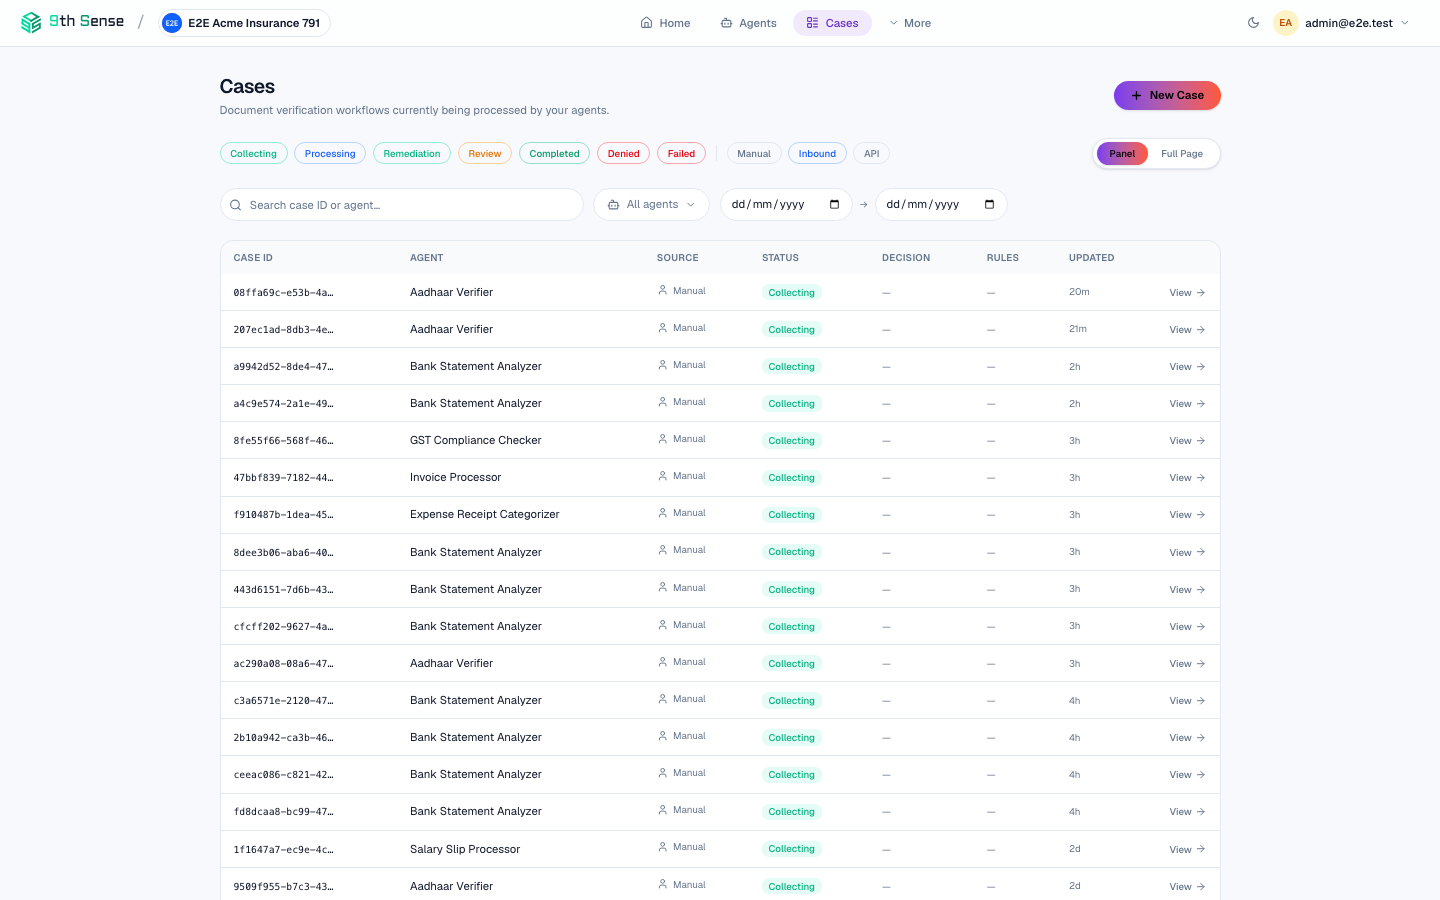 Cases list showing status filter chips, search bar, and case rows with Case ID, Agent, Source, Status, and Updated columns
Creating a case
Go to Cases → New Case
Click the + New Case button in the top right of the Cases list.
Select an agent
Choose the deployed agent that should process this case (e.g. kyc_individual, bank_statement_v2). Only deployed agents appear in this list.
Add subject metadata
Enter the subject's reference ID and any custom attributes your agent expects (e.g. applicant_name, loan_id). These fields are defined per-agent and appear dynamically.
Upload documents
Drag and drop documents into the upload area, or click Upload. You can upload multiple files at once. The agent's classifier runs immediately and assigns each file to the correct document type.
Submit
Click Submit. The case moves to processing. You can close the page — the agent runs asynchronously. You'll receive a webhook event when it completes if one is configured.
Viewing a case
Click any row in the Cases list to open the case detail view. The detail view has four tabs:
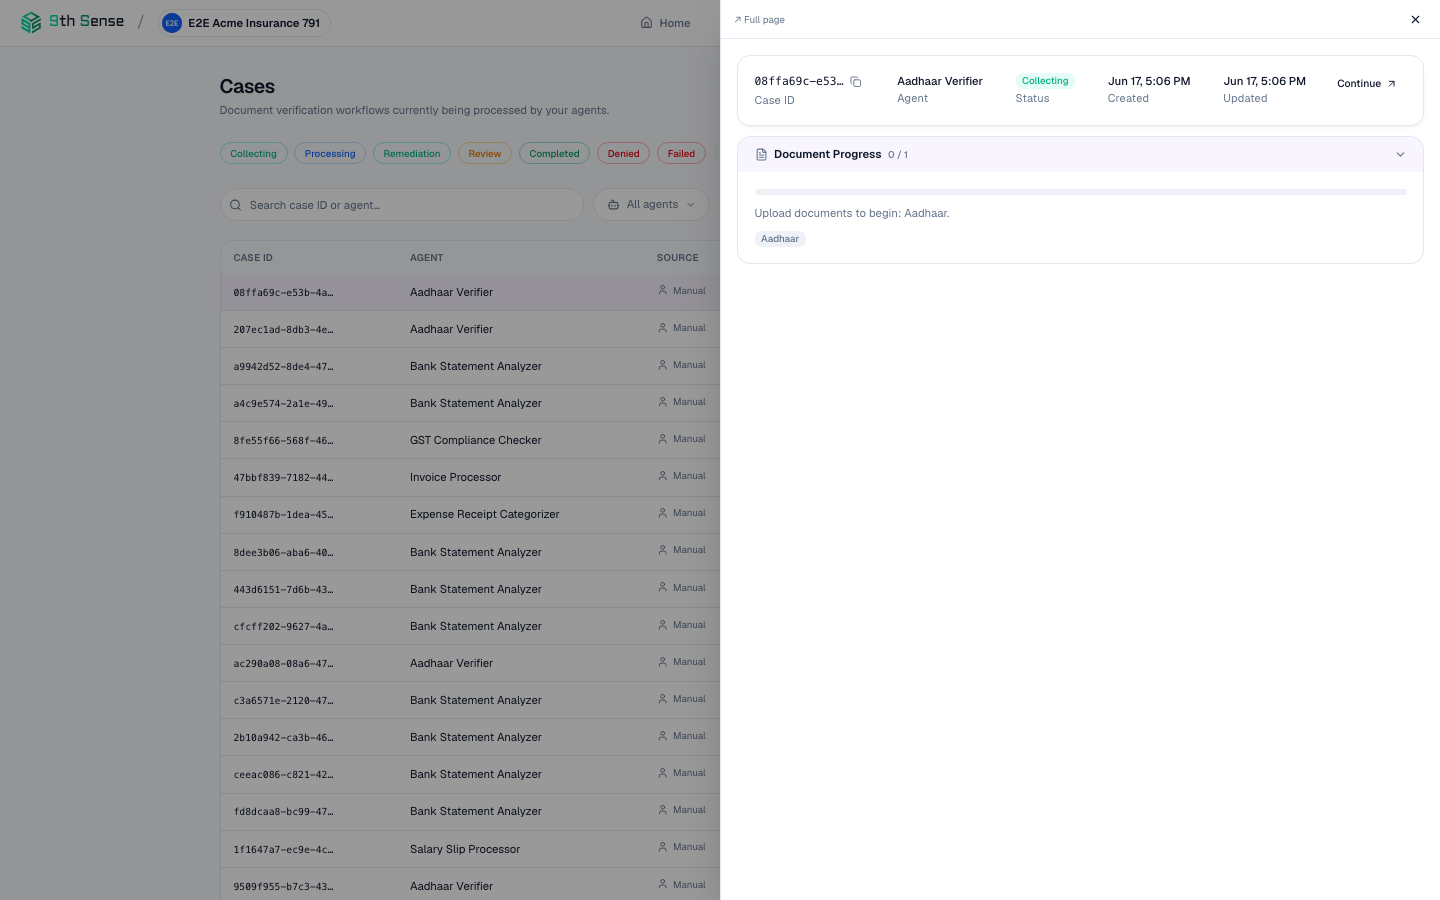 Case detail drawer showing Case ID, Agent, Status, Created date, and Document Progress section with required document type
Overview tab
Shows the case summary — current state, agent used, subject reference, opened and completed timestamps, and the final goal outcome (e.g. APPROVED, REJECTED, REVIEW_REQUIRED).
Documents tab
Lists every document attached to the case. For each document you can see:
- The document type it was classified as
- Extracted fields and their values
- Any validation failures
- The risk score and any fraud-check verdicts recorded for it
Click View next to any document to open the full extraction result in a side panel.
Executions tab
A chronological log of every step the agent ran — classification, extraction, validation, fraud and risk checks, webhook deliveries. Each execution shows:
- Step name and parameters
- Result and status (
completed/failed) - Latency in milliseconds
- Token counts (for AI-backed steps)
This is your primary debugging surface.
Messages tab
For Level 2 (conversational) agents, every message exchanged between the agent and the subject appears here in chronological order, alongside the documents they triggered.
Reviewing a case
When a case reaches the review state, it appears in the Cases → Pending Review queue. Open the case and scroll to the Review panel at the bottom.
Read the agent summary
The agent provides a structured summary of what it found — extracted fields, validation results, and the risk score — with the key signals highlighted.
Check documents
Switch to the Documents tab to inspect individual extractions. Click any document to see the extracted fields next to the original file.
Record your decision
Select Approve or Reject. Add a mandatory review note explaining your decision (required for audit compliance). Click Submit Review.
The case moves to completed. Your decision and note are stored in the audit log and cannot be changed.
A submitted review is permanent. If you made a mistake, open a new case for the same subject — do not edit the completed one.
Filtering and searching
The Cases list supports:
- Status filter — show only
collecting,processing,review, orcompletedcases - Agent filter — narrow to cases run by a specific agent
- Date range — filter by case open date
- Search — search by subject reference ID or case ID
Export
Click Export CSV in the top-right of any filtered Cases view to download the visible rows. The export includes case ID, subject reference, agent name, status, open date, and completion date.
Programmatic access
Use the REST API to create and query cases without the dashboard:
# Create a case
curl -X POST https://api.9thsense.ai/v1/cases \
  -H "X-Api-Key: zk_live_..." \
  -H "Content-Type: application/json" \
  -d '{"agent_goal": "kyc_individual", "subject_ref": "CUST-001"}'

# Get case status
curl https://api.9thsense.ai/v1/cases/{case_id} \
  -H "X-Api-Key: zk_live_..."
See the Cases API reference for the full endpoint list.