Checklist and step-by-step guide for taking a 9thSense agent from development to production
Deploy to Production
This guide covers everything you need to do before and after deploying a 9thSense agent to a live environment — production API keys, webhook verification, error handling, and monitoring.
Pre-deployment checklist
- Agent is built and tested in the Playground with at least 5 real document samples
- All pipeline steps are validated (no steps returning unexpected
nullfields) - Review policy is configured (or intentionally left blank for auto-complete)
- A webhook endpoint is deployed and can receive HTTPS POST requests
- Your backend has a retry mechanism for
5xxresponses from the 9thSense API - You have a
write-scoped production API key (not the development key)
Step 1 — Deploy the agent
- Go to Agents in the dashboard.
- Open your agent and confirm it is at the version you want to deploy.
- Click Deploy.
- Confirm in the dialog.
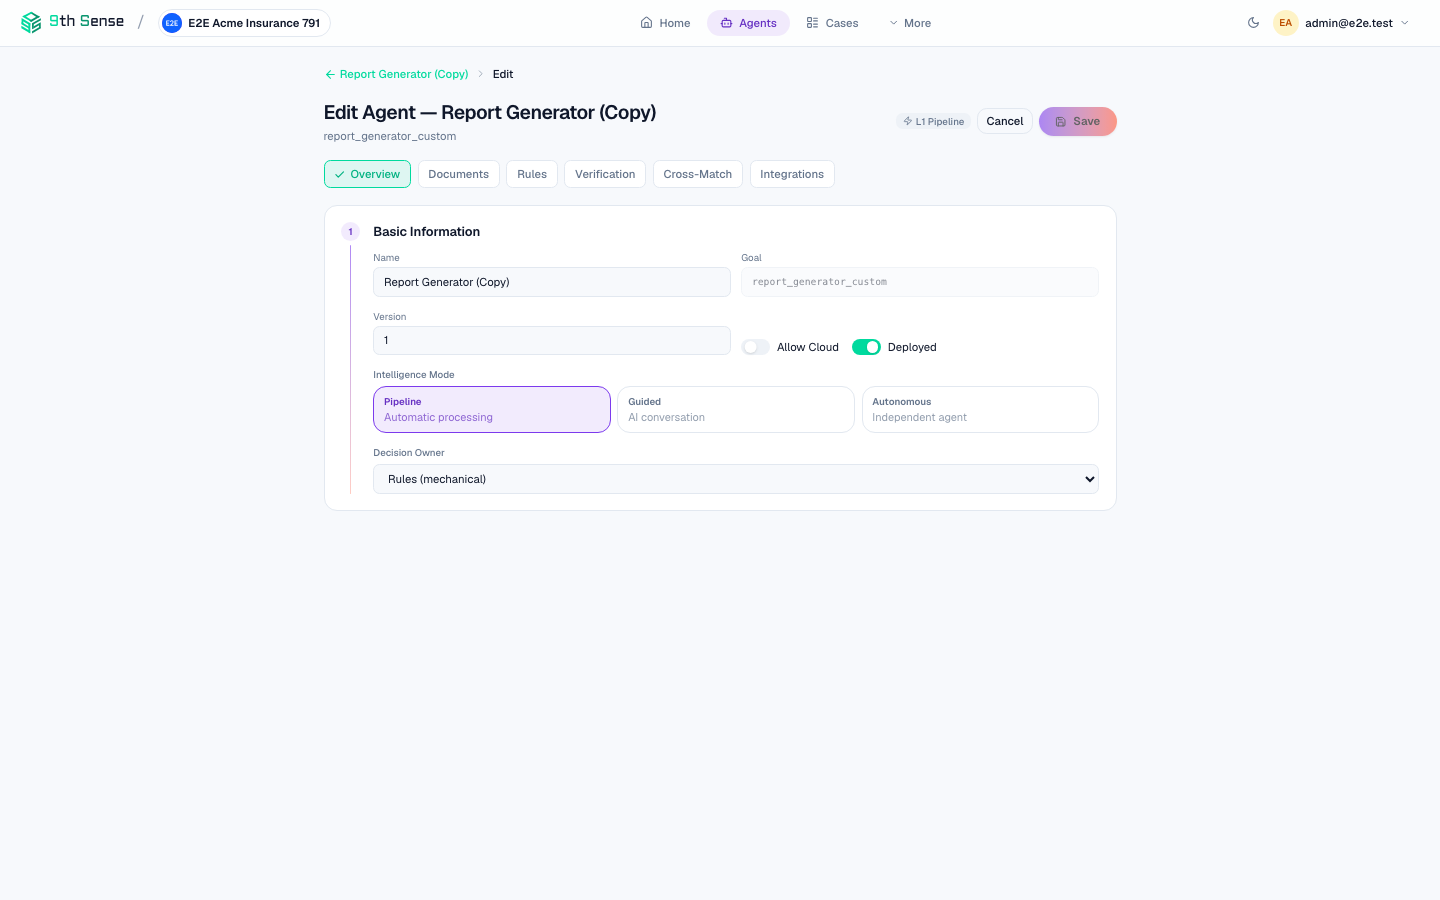 Agent editor with the Deployed toggle active, showing agent name, goal slug, version number, and pipeline configuration
The agent status changes to Deployed. Note the agent_goal slug — you'll pass this as goal when creating cases.
Step 2 — Create a production API key
Never use a development key in production. Development keys have overly broad scopes and are harder to audit.
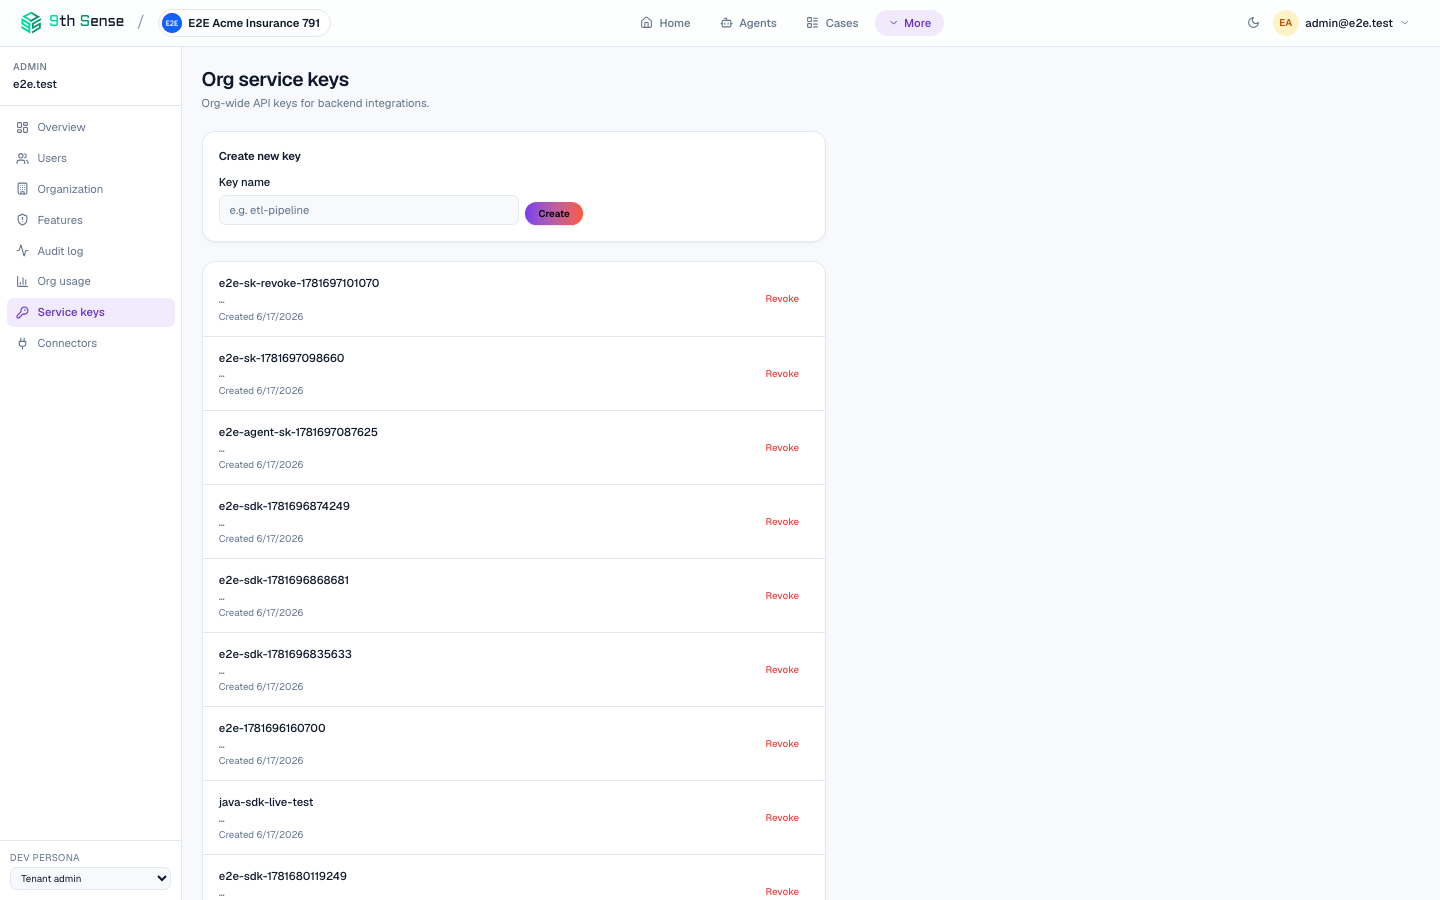 Service keys page — create a production key here with a name, then copy the one-time plaintext before closing
- Go to Admin → API Keys → New Key.
- Name it clearly:
"Production backend — <service name>". - Select only the
writescope (your backend does not needadmin). - Copy the key and store it in your secrets manager (AWS Secrets Manager, GCP Secret Manager, HashiCorp Vault, etc.).
- Inject the secret into your service as an environment variable — never hardcode it.
import os
from ninthsense import Client

client = Client(
    api_key=os.environ["NINTHSENSE_API_KEY"],
    base_url="https://api.9thsense.ai",
)
Step 3 — Configure webhooks
Polling for case completion works in development but is fragile in production. Set up a webhook endpoint instead.
Register a webhook endpoint
In your backend, create an HTTPS endpoint that accepts POST requests:
# FastAPI example
from fastapi import FastAPI, Request, Header, HTTPException
from ninthsense.webhooks import construct_event, WebhookVerificationError

app = FastAPI()
WEBHOOK_SECRET = os.environ["NINTHSENSE_WEBHOOK_SECRET"]

@app.post("/webhooks/ninthsense")
async def handle_webhook(
    request: Request,
    x_digio_checksum: str = Header(None),
):
    raw_body = await request.body()
    try:
        event = construct_event(raw_body, {"x-digio-checksum": x_digio_checksum}, WEBHOOK_SECRET)
    except WebhookVerificationError:
        raise HTTPException(status_code=400, detail="Invalid signature")

    if event["type"] == "case.completed":
        case_id = event["data"]["case_id"]
        verdict = event["data"]["verdict"]
        # update your database, trigger downstream actions, etc.

    return {"ok": True}
Register the endpoint in the dashboard
- Go to Admin → Connectors (or per-agent webhook in the Agent Builder).
- Enter your endpoint URL and the shared secret.
- Click Test to send a test event and verify your handler works.
- Save.
The webhook secret is used to generate an HMAC-SHA256 signature in the X-Digio-Checksum header. Always verify this before processing.
Return 200 quickly (within 5 seconds). Move heavy processing to a background job. If your endpoint returns 5xx or times out, 9thSense retries with exponential backoff (1s, 2s, 4s, 8s, 16s). After 5 failures the event is marked failed and no more retries occur.
Step 4 — Open a case from your backend
import asyncio
import os
from ninthsense import Client

async def start_kyc_case(document_path: str, customer_id: str) -> str:
    async with Client(
        api_key=os.environ["NINTHSENSE_API_KEY"],
        base_url="https://api.9thsense.ai",
    ) as client:
        case = await client.cases.create(
            goal="kyc_individual",
            metadata={"subject_ref": customer_id},
            idempotency_key=f"kyc-{customer_id}",
        )

        with open(document_path, "rb") as f:
            await client.cases.upload(case.id, f.read(), "pan_card.jpg")

        # Don't poll in production — the final result (extracted fields,
        # check verdicts, rule outcomes) is delivered via webhook.
        return case.id   # store this for correlation with the webhook event
Always pass idempotency_key in production. If your service retries a failed request, 9thSense deduplicates based on this key and returns the original run result instead of starting a new one.
Step 5 — Handle errors
import logging
from ninthsense.exceptions import (
    AuthenticationError,
    RateLimitError,
    APIError,
)

logger = logging.getLogger(__name__)

try:
    case = await client.cases.create(goal="kyc_individual")
except AuthenticationError:
    # API key is invalid or revoked — do not retry, alert ops
    raise
except RateLimitError as e:
    # You've hit the rate limit — back off and retry
    await asyncio.sleep(e.retry_after or 60)
    # retry...
except APIError as e:
    # 5xx from the server — safe to retry with backoff
    logger.error("9thSense API error: %s", e)
    # retry with exponential backoff...
Step 6 — Monitor in production
Dashboard
- Cases → filter by your deployed agent. Watch the
processingqueue depth — a spike means the pipeline is slow or stuck. - Analytics → check processing volume, avg. processing time, and case completion rate after launch.
- Admin → Audit Logs → filter by your production API key prefix to see every call it made.
Alerts to set up
Set up alerts in your monitoring system (Datadog, Grafana, CloudWatch) on:
- Webhook endpoint
5xxrate > 1% - Avg. case processing time > 30 seconds (indicates a slow step)
RateLimitErrorcount > 0 (you may need a quota increase)
Rotating an API key
When a key is compromised or you are doing a scheduled rotation:
- Create the new key in Admin → API Keys.
- Deploy the new key to all services using it (update the secret in your secrets manager).
- Verify the services are using the new key (check audit logs — you should see traffic from the new prefix).
- Revoke the old key.
Do steps 1–3 before step 4. Revoking first causes downtime.
Rate limits
| Limit | Default |
|---|---|
| Requests per minute | 200 |
| Concurrent runs | 20 |
| Max file size | 50 MB |
| Max pages per PDF | 10 sampled automatically |
To request higher limits, contact your account manager.