How to build, configure, test, and deploy agents in the 9thSense dashboard
Agents
An agent is the brain of a case. It defines the goal (what verification must happen), the pipeline (which tools run and in what order), and the policy (thresholds, retry rules, review triggers). Every case runs against exactly one agent, and the agent version in use is snapshotted at case creation — so updating an agent never affects in-flight cases.
Two agent levels
| Level | Name | Use when |
|---|---|---|
| Level 1 | Extraction agent | You own the document collection. Your backend creates cases and uploads files. The agent runs the pipeline and returns a structured result. No conversation needed. |
| Level 2 | Conversational agent | The agent talks directly to your end user, asks for documents, handles re-uploads, and resolves ambiguity through dialogue. Requires the Chat SDK or an embedded flow. |
Start with Level 1 unless you need the agent to communicate with end users.
Viewing your agents
Go to Agents in the sidebar. Each row shows the agent name, goal identifier, type (Level 1 or 2), version number, and deployed status.
Agents are not active until deployed. A draft agent can be edited freely without affecting production.
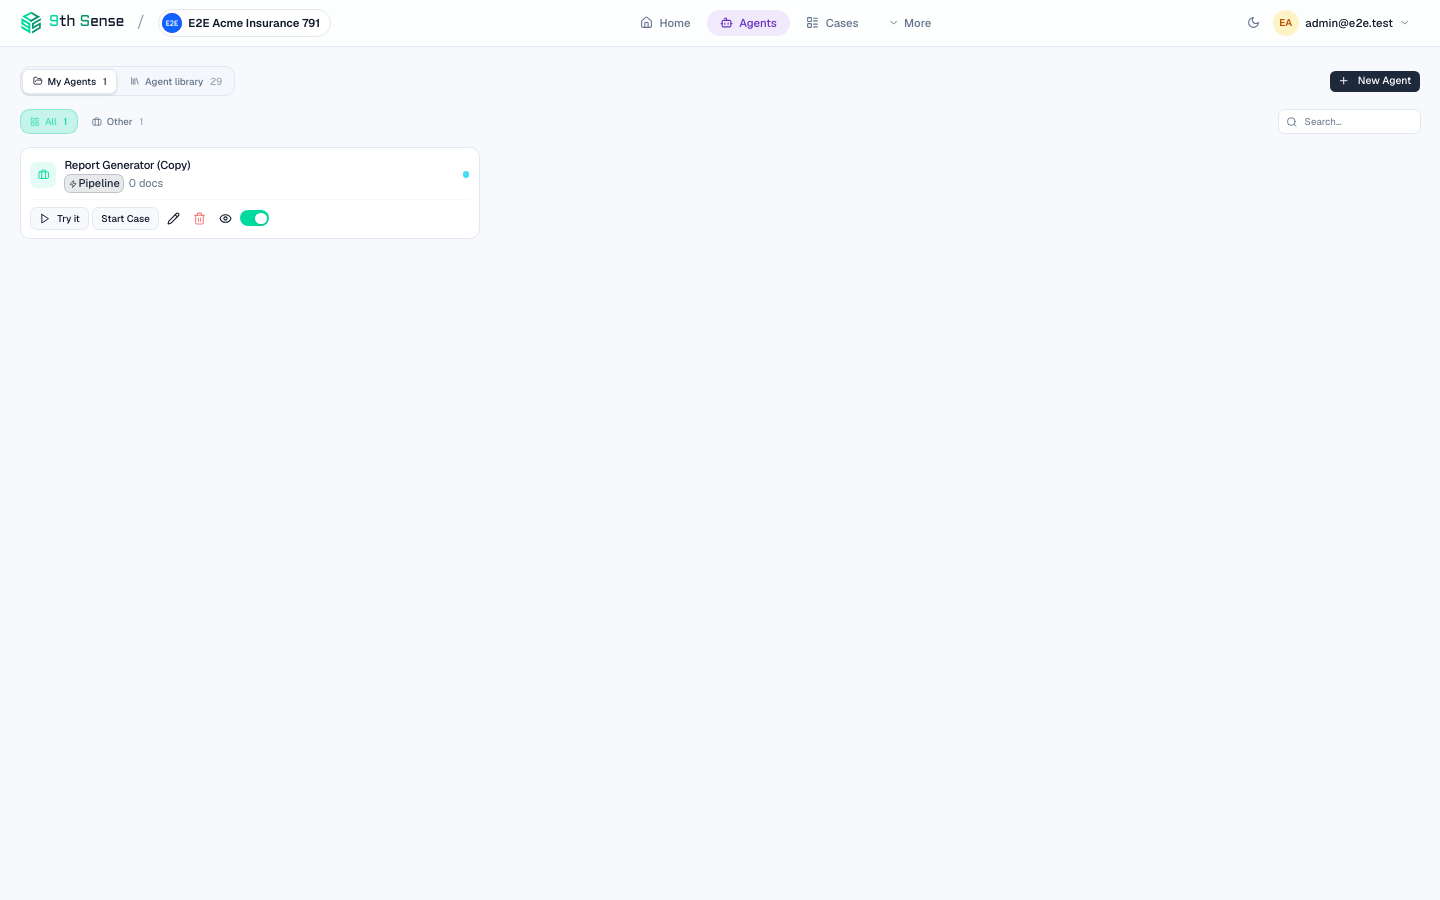 Agents list showing a deployed agent card with name, goal identifier, Pipeline type badge, Try it / Start Case buttons, and a deployed toggle
The Agent Library
You rarely need to build from scratch. The Agent library tab ships 37 ready-made agents across KYC & Identity, Audit, Income & Lending, Insurance, Travel, Compliance, Merchant, and HR — each pre-wired with document types, fraud checks, and Goal Rules. Start Case runs one immediately; Try it opens it on a sample.
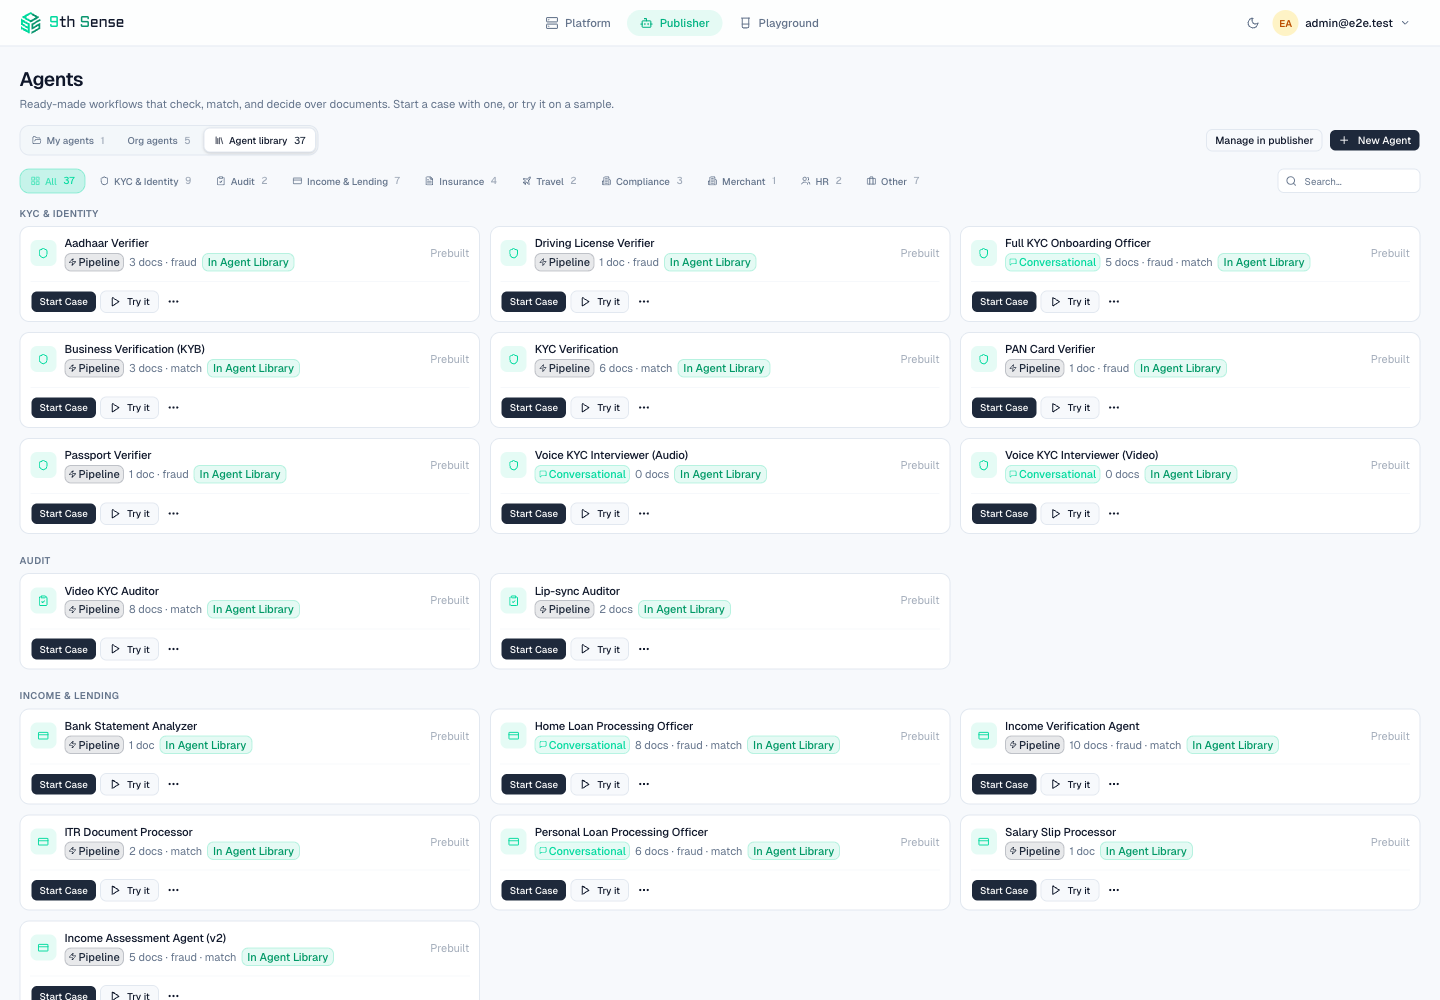 Agent library grid showing ready-made agents — Aadhaar Verifier, KYC Verification, Full KYC Onboarding Officer, Video KYC Auditor, Lip-sync Auditor, Bank Statement Analyzer, Income Verification Agent, Home Loan Processing Officer and more — organised by category with Start Case and Try it buttons
Cloning a library agent copies its full definition into your workspace, where you can adjust document slots, thresholds, and rules before deploying.
Building an agent
Click New Agent
Go to Agents → New Agent.
Set the goal
Enter a goal identifier — a short machine-readable slug like kyc_individual or bank_stmt_salaried. This is the key your backend will pass when creating cases (agent_goal field). It cannot be changed after deployment.
Choose the level
Select Level 1 (Extraction) or Level 2 (Conversational). The builder UI adapts to show the relevant configuration fields.
Configure the pipeline
For Level 1 agents, the workflow is a sequential list of steps. A typical KYC flow:
Classify → Extract → Validate (goal rules) → Fraud & risk checks → Deliver webhook
Click Add Step to append a step. For each step, configure:
- Action — Classify, Extract, Validate, a fraud check, risk assessment, or webhook delivery
- context_id — the Document Type to use (for extraction and validation steps)
- Conditions — optionally make a step conditional (e.g. only run risk assessment if validation found no failures)
Set review policy (optional)
Under Review Policy, set the conditions that push a case to human review:
- Risk score above a threshold (e.g. risk > 0.7)
- Specific validation failures (e.g.
pan_numbermismatch) - Always require review (for regulated workflows)
Leave blank to auto-complete without review.
Save as draft
Click Save. The agent is saved as a draft at version 1. You can continue editing without affecting anything in production.
Level 2 — Conversational agent config
Level 2 agents have additional fields:
| Field | Description |
|---|---|
| Persona | The agent's name and tone (e.g. "Aria, friendly and concise"). Shown to end users. |
| Goal rules | The declarative checklist the agent must satisfy before completing — deterministic rules, fraud-check thresholds, and custom AI rules. See Goal Rules. |
| Verification policy | How strictly to enforce document and capture quality before accepting an upload (liveness threshold, blur threshold, etc.). |
| Fallback message | What the agent says when it cannot understand a user message. |
Testing an agent
Before deploying, test your agent in two ways:
Playground
Go to Playground and select your draft agent (instead of a Document Type). Upload a test document and see the full run — including which steps ran, what they returned, and how long they took.
Chat (Level 2 only)
Go to Agents → [your agent] → Chat Preview. This opens an embedded chat window running the full Level 2 conversational flow against the sandbox environment. Upload test documents to see the agent respond.
Deploying an agent
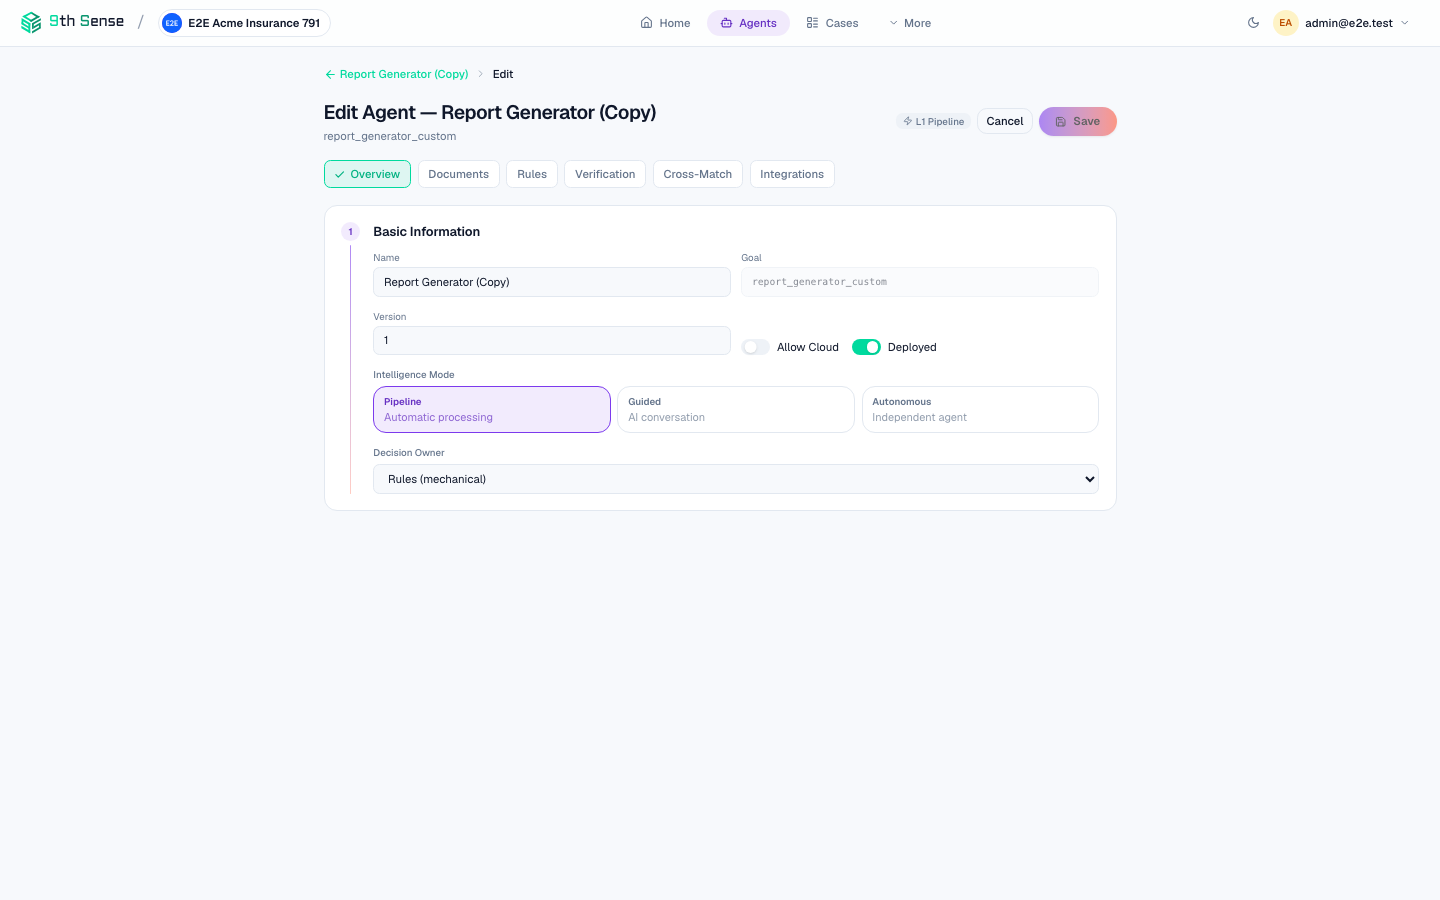 Agent editor showing name, goal slug, version, Intelligence Mode selector (Pipeline / Guided / Autonomous), and Decision Owner — with tabs for Overview, Documents, Rules, Verification, Cross-Match, Integrations
When you're satisfied with the agent:
- Open the agent detail page.
- Click Deploy.
- Confirm in the dialog.
The agent status changes to Deployed. From this point, new cases can be opened against this agent via the API (agent_goal field) or the dashboard.
Deploying an agent does not stop in-flight cases — they continue on the agent version that was active when they were created.
Updating a deployed agent
Click Edit on a deployed agent. Your changes are saved as a new draft version (e.g. v2). The deployed version (v1) continues serving cases until you explicitly deploy v2.
To deploy the update, click Deploy again. New cases will use v2; existing cases continue on v1 until they close.
Agent versioning
Every saved version of an agent is retained permanently. You can view the config diff between versions from the Versions tab on the agent detail page.
When a case is created, the exact agent config at that moment is captured as an immutable snapshot (agent_snapshot field on the case). This means you can reconstruct exactly what logic ran on any historical case.
Deleting an agent
You can only delete an agent that has no open cases. Archive the agent instead (Actions → Archive) to prevent new cases from being created against it while preserving the history.